
Using the Shopping cart within the Events Calender.
The Events Management system has a built in shopping cart in which you can create your Event Products, set up Your Tax Rates and other Options, as well as set up your Payment Gateways or Merchant services.
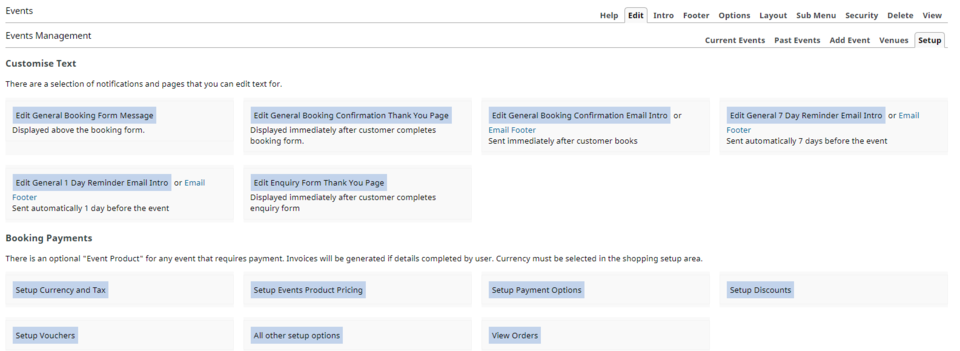
Setup Currency, Tax and Payment Options.
This link takes you to the Shopping cart options. Please refer to our Shopping Section for full details BUT The two main areas you need to set up are:
- Setup Currency and Tax
- Setup Payment Options
Please note: that the Events Shopping cart fundamentally uses the same engine as our normal shopping cart.
Running Two Shopping carts: If you already have a shopping cart on your site and add the Events Management System then most options such as tax rates, freight and Payment Gateways should be already configured. If not then they need to be set up exactly the same to eliminate conflicts.
eg. You can't run two carts with different tax rates, or one with tax included and one without.
Setup Event Product Pricing
To enable us to add a dollar value to each seat of our event we use the Product Pricing area in the Event shopping cart to create a very basic product, we can then assign this product to the event via the event options.
Creating your event products is fairly straight forward and you only need to basic information of the product such as Title and Price. Click the Setup Events Product Pricing and then click the Add New Product button to add this basic information.
Important Note: As the product creation tool is using the same system as the standard shopping cart the product options are endless. please note that these are not necessary when creating a product for events. Also note that unlike the standard shopping cart products in the events system DO NOT USE CATEGORIES.
Once your products are created and your cart is set up we need to exit the shopping cart area and re-enter the Events Management area.
Click on your Events page to return to the Events Management area.
More From This Section
FAQ Topics
Building your site
- Pages
- Content Editor Modes Explained
- - DRAG DROP Editor (Default)
- - CONTENTBOX Editor (Advanced)
- - WORD STYLE Editor (TinyMCE)
- - LIVE Editor (Click to Edit Mode)
- Styling Content
- Images / Backgrounds
- Banners and Sliders
- Uploading content
- Design Templates
- Forms
- More Q & A
- Menus
- Mobile Styling and Optimisation
Advanced Page Types
E-Commerce
- Shopping Basics
- Product Pricing, Currencies
- Category Management
- Ngā Hua
- Product Options
- Layout and Formatting
- Ngā Kōwhiringa Utu
- Freight - Couriers
- Processing Orders
- Orders / Invoices
- Advanced Ecommerce
- Plugins
- Wholesale
- Bookings Management System
- Stock & Quantities
- Vouchers, Discounts, Loyalty Points
- Selling Photos / Prints
- Shopping Cart Add-on Page types
- Advanced APIs / Add ons
- Te Wāhi Hoko (POS)
- Reports
Email & Membership
- Member Management
- Members Pages / Template Customisations
- From Addresses and Reply To Email Notifications
- Global Enquiry form options
- Standard Field Names
- Webmail
- Bulk Email
- CRM Features
- Email Campaigns
- Forums & Blogs
- Pop3/Imap Email Services
- Scams and Hoaxes
- Lead Magnets / Growing Your Customer Database
Promoting your site
Advanced
- Power User Options
- Form Spam Filtering
- Wordpress
- PHP Setup
- [TAGS]
- jQuery snippets
- Search External Links / Import external content
- HTML / CSS Snippets
- Embedding Web Fonts
- Loading additional Material Symbols styles
- FAQ Help Map
- Uploading local font files
- Advanced Template Customisation, CSS, etc
- Languages and Translations
- Importing Content from Another Platform