While the checkout page is a system generated page - there are options to add content to various areas of the checkout page.
How to insert custom text on the checkout page
- Click the main menu link ECOMMERCE on the left-hand side.
- From the options presented - find the DISPLAY OPTIONS section and click the Insert Custom Text button.
- Scroll down to the Checkout - Additional Text Insertion area.
- Use one of content areas shown below to add your text.
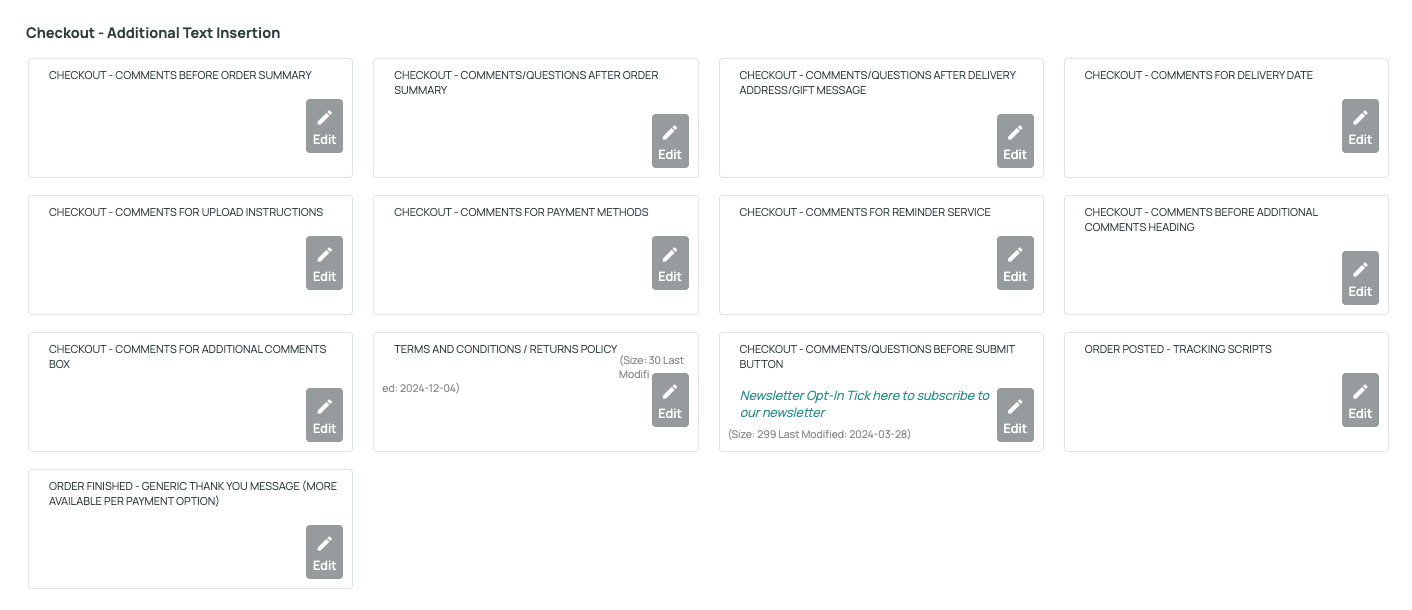
Above: The content areas available to add custom text. If an area contains content it will be shown in blue italics.
Adding Form Fields to the checkout content areas
If you would like to add form fields to the area for additional questions you can drag-drop snippets into the relevant content area.
Either select the FORM FIELD dropdown from the sidebar, or click the green ADD SNIPPET button in the main editor area, and then click the FORM FIELD button on the left.
You can add different types of form field to the page, the most used being the checkbox option as shown below:
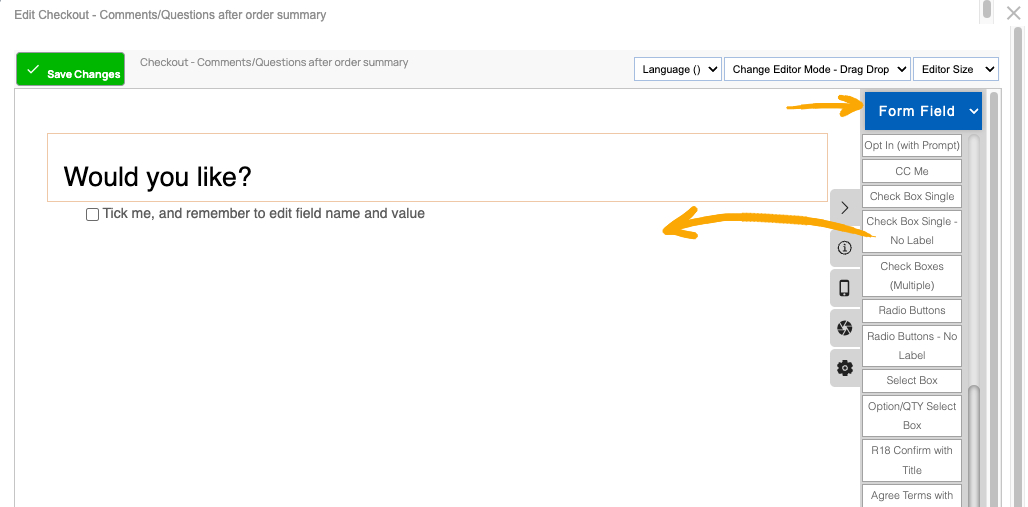
The screen above shows dragging a single checkbox field into the page.
Giving the added form field a unique, understandable field name
With form fields you should edit the field name to something understandable via the blue EDIT INPUT button that appears when you hover over the field in the editor.
The answer will then appear as additional information on the order.
More From This Section
FAQ Topics
Building your site
Advanced Page Types
E-Commerce
- Shopping Basics
- Product Pricing, Currencies
- Category Management
- Products
- Product Options
- Layout and Formatting
- Payment Options
- Freight - Couriers
- Processing Orders
- Orders / Invoices
- Advanced Ecommerce
- Plugins
- Wholesale
- Bookings Management System
- Stock & Quantities
- Vouchers, Discounts, Loyalty Points
- Selling Photos / Prints
- Shopping Cart Add-on Page types
- Advanced APIs / Add ons
- Point of Sale (POS)
- Reports
Email & Membership
Promoting your site
Advanced
- Power User Options
- Form Spam Filtering
- Wordpress
- PHP Setup
- [TAGS]
- jQuery snippets
- Search External Links / Import external content
- HTML / CSS Snippets
- Embedding Web Fonts
- Loading additional Material Symbols styles
- FAQ Help Map
- Uploading local font files
- Advanced Template Customisation, CSS, etc
- Languages and Translations
- Importing Content from Another Platform